EEG Caps
The EEG caps panel puts EEG nets on a head model that already exists, without re-running charm, and lets you check how a net sits on the subject’s scalp. Turn it on in Settings ▸ Extensions ▸ EEG caps; it then has its own row under Extensions.
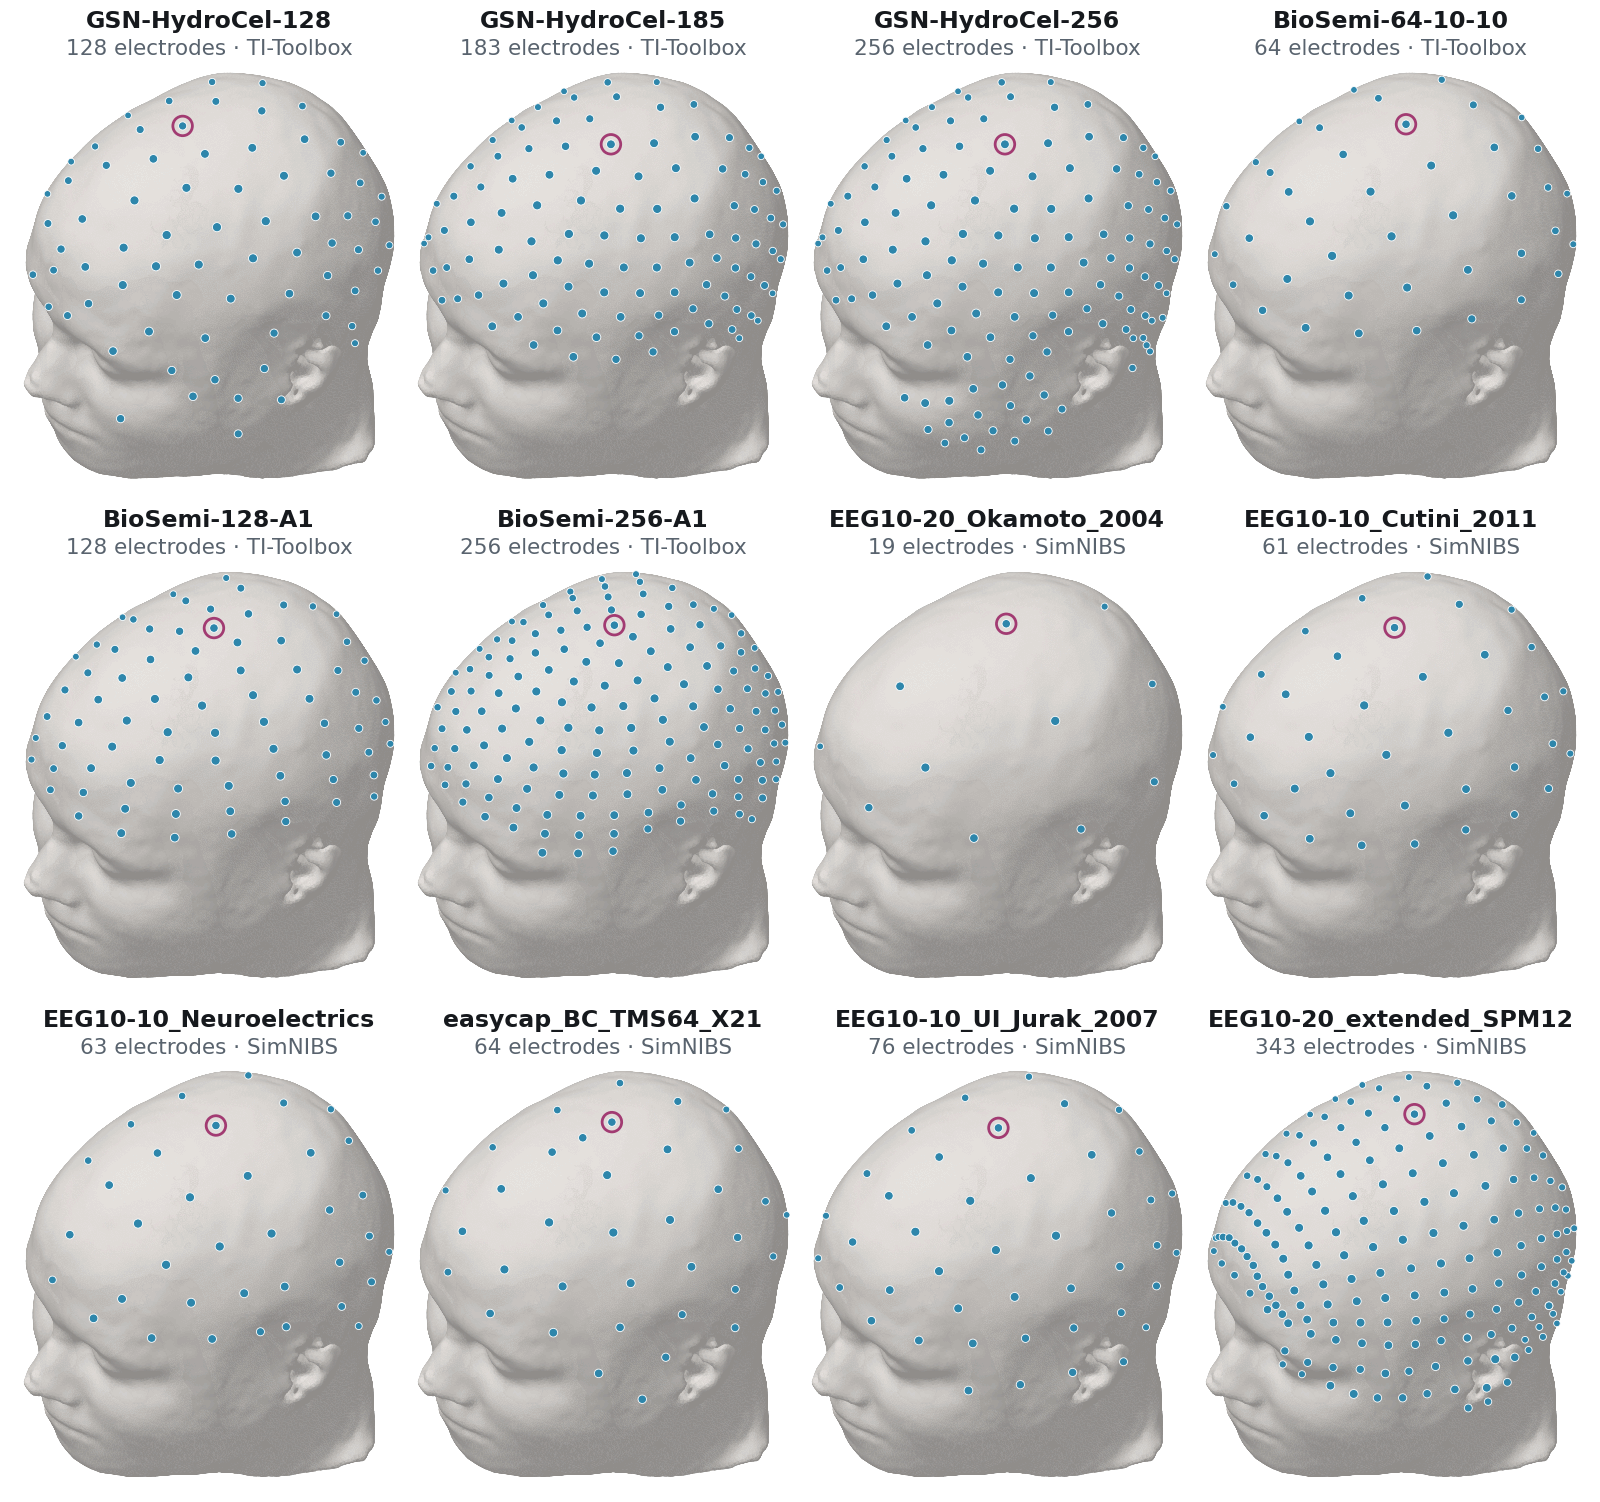 Every cap the image ships, warped onto ernie's head with the toolbox's own warp (what charm and Apply selected run), all seen from the same viewpoint. TI-Toolbox caps: GSN-HydroCel-128 (128 electrodes), GSN-HydroCel-185 (183), GSN-HydroCel-256 (256), BioSemi-64-10-10 (64), BioSemi-128-A1 (128) and BioSemi-256-A1 (256). SimNIBS caps: EEG10-20_Okamoto_2004 (19), EEG10-10_Cutini_2011 (61), EEG10-10_Neuroelectrics (63), easycap_BC_TMS64_X21 (64), EEG10-10_UI_Jurak_2007 (76) and EEG10-20_extended_SPM12 (343, four of them second names for T7, T8, P7 and P8). Counts include a cap's reference electrode. Only electrodes on the near side of the head are drawn; the ring marks Cz, or the electrode nearest to it.
Apply a cap
- Pick a subject that has a head model (
m2m_<id>). - The Caps table lists every MNI cap the image ships, plus any you added to this project. Source says where a cap comes from: TI-Toolbox (the GSN-HydroCel and BioSemi caps TI-Toolbox ships), SimNIBS (SimNIBS’s own caps), uploaded (added to this project), or subject only (a net on the subject with no MNI file to re-apply from). Each cap has a status, not on subject or on subject, and the date a cap on the subject was applied. The inspection below flags a cap whose electrodes collapsed.
- Tick the caps you want and press Apply selected, or Re-apply all to refresh every cap already on the subject.
Applying does exactly what charm does at the end of a head-model build: the MNI cap is warped onto
this head and projected onto the scalp, and written to m2m_<id>/eeg_positions/<cap>.csv (with a
.geo for Gmsh). It takes a few seconds per cap. If a cap is already on the subject, the panel asks
first: Skip keeps the existing file, Replace and rerun overwrites it.
Re-apply a cap to refresh it on an existing head model instead of rebuilding the head model.
Add your own cap
Add MNI cap… takes a CSV in MNI millimetres with one electrode per row,
Electrode,x,y,z,name (ReferenceElectrode and Fiducial rows are also accepted), the format of
SimNIBS’s ElectrodeCaps_MNI files. The file is checked, stored in
code/ti-toolbox/eeg_caps/, and can then be applied to any subject in the project. A file name
that one of the image’s caps already uses is refused; rename your file.
Inspect a net
Click a cap that is on the subject (or choose it under Net). The right pane draws its electrodes on the subject’s scalp, as the Simulator draws them, with the head hiding those round the back, and the panel shows:
- a summary: electrode count, median and minimum spacing to the nearest neighbour, and the largest distance from an electrode to the scalp;
- a warning when two electrodes are closer than 2 mm (they collapsed onto one point — the sign of a cap in the wrong coordinate space) or when a label appears twice; collapsed electrodes are drawn in red;
- a sortable table of every electrode: Label, Nearest electrode, Spacing to nearest (mm) and Distance to scalp (mm). Click a row to ring its electrode in the 3-D view.
Compare with draws a second net in orange and adds, for each electrode, the nearest electrode of the other net and the distance between them — a quick way to see how two caps’ sites correspond on this head.
The (i) at the top right of the Caps and Inspect cards opens a short version of this page in the app.